Friday 2 December 2011

DIY-Starry Nails

Base colour- Milky pink
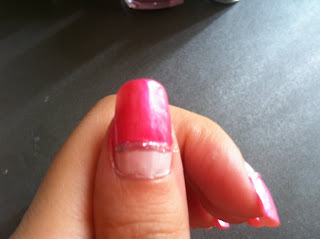
Cover with Baby pink for 4-fifth of the finger.
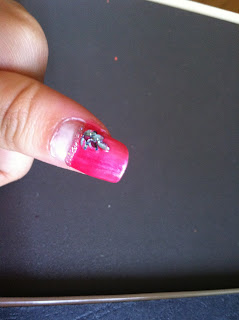
Scatter the stars with a toothpick dipped in gloss.

What didnt work out:
-wanted a neat curve edge at the cuticle, but the brush was too big :(
-Stared doming off.. i suppose if i spent enough time putting a coast of gloss over and gently press down each starry edge, it could last longer..I was impatient and wanted to get this over quickly :S
-Arrangement: 'draw' or imagine the exact place u wanna place them, unless u have super artistic mind u can immediately visualise wat is a good spot!


DIY: Candy-coloured stripes

Experimenting withte colours:

Baby pink and this pastel purple looks kinda good together :)


A-Baby pink

B-Pastel purple


Thumb-A

1st finger- A/B

Middle Finger- B

Fourth Finger- A

Last finger - A/B


Use white nail art paint with thin brush and add 5 strokes on each finger, starting with the middle line.

last finger will do with just 3 lines.


Saturday 19 November 2011

Wedding nails

Was considering whether to let a professional handle my manicure for my wedding photoshoot, and i guess i was lazy enough not to make an appointment. So i did it myself..

The following was how, ambitiously i thought I could have my french manicure outlined with crystals and expect them to last another 3 days as we flew overseas to have a shoot. Naivity you would say..
They were good and obedient for a day or two as i made extra careful efforts to protect them. and then, it just happened.

For absoulutely no reason i can recall, The crystals just came off, in pairs and pairs! zzz. so i did a last minute restoration at the hotel.. This time round, realistically without any crystals! Good thing the flower stickers remained :)
Nude pink base + China Glaze white tip. Loved it. simple and wont clash with any of the gowns u choose. perfect for close up 'hand-shot' with our rings.

Thursday 20 October 2011

DIY: Hand-drawn rose

A stalk of rose amoung the vines


To draw the rose, let the pictures tell the story


1) Put a chinese comma(mini c) in the center


2) from the center of the 'c', draw another interlocking 'c'


3) Somewhere above, use a small bracket "(" to cover


4) another Bracket on the opposite side


5) Cover the top with a last bracket


Try it on paper with some ink pen first! Ensure that none of the petals actually have contact with each other.


Complete it with a stroke of stalk and leaves or with vines :)


PS: i removed the shatter background and put the rose on solid Metallic purple instead. Better results as seen in first pic!

Tuesday 20 September 2011

Sakura Nails

From a distance, it actually looks good :) The branches, the sakura blossoming and the different shade. A person even commented he could imagine/hear the birds sing when he saw my nails. But alas, that's from afar.. since its not too outstanding, i shan't really elaborate on this.


And yes, you're right. The ring was to placed as a decoy to distract :)

Tuesday 16 August 2011

How to: Red French Semi-Lolly


Apply a slightly translucent glitter base. Followed by french hot pink. Yes it doesnt look too neat, can clean that up later :P


Dot-outline the french. Pretty Good effect the cover the imperfect strokes :)


Draw 2 semi-circles on the left, right and tip of every finger. End with a circle in the middle as shown. I couldnt 'draw' them with my thin brush so i might as well use the dotting pen to complete the semi-circles. Slowly but steadily!


Dot a smaller pink in the middle circle with a toothpick or dotting tool. A final smaller white dot to create the lolly effect!


Ta-da! Due to the lack of space, only the thumb has the full lolly circle :P

Monday 8 August 2011

How to: Simple lining

A simple and lasting design:

From the last little finger,

draw a white line diagonally across,

highlight with silver glitter on both sides.


OPI base. Will rae about it in another post!

Tuesday 26 July 2011

Shatter series

I Chose a lighter base (silver and white)


Then blue over! Amazing!! Once it dries, its shatters!! How?? Curious over the chemistry..


Anyway, its really not that simple. that was my 2nd attempt over 10 nails. Also tested the different base colours. Thre pressure, the strokes, the speed..

Catch the different brilliant colours.
http://www.youtube.com/watch?v=Mx_rzHzMXUE

Sunday 17 July 2011

Tuesday 12 July 2011

OPI polishes

They're good and quite costly.

But i'm very proud to claim that i have found a place to get it quite cheaply :)

Sunday 10 July 2011

How to: 3D Sticker french tip

Beautiful pink :)


French with purple glitter tip
and line with silver L-shape at the side and bottom.


Any flowers stickers. I like 3D popoed up effect. and they tend to stay longer too:)

Apply a base coat, paste the stickers with tweezers, press down gently (especially at the edges!!)

Coat with gloss.


Flowers and butterflies are loves :)


Thursday 7 July 2011

How to: Stripes

Animal Stripes:

A small advise would be to start doing this on toes as they have a larger surface area to practice on. You can start with any background and a white/black thin brush polish.


Focusing on the big toes :P start from any side. Press down the white brush and slide horizontally. U can adjust the length but anywher past the middle would be good. As u slide, lift up the brush a little (for lesser pressure) so as to create the taper effect.

Continue on alternate sides.


After that, if space allow, from the root( thickest side) draw another smaller taper creating a V-shape.

Done:)

Stripes are fun and have no restrictions, here's another way for fingers:


On a sad note, even though the orange base looks fresh and bright (Photo is a little dull), but i couldnt help missing my pink.


So this stripes only managed to stay on my fingers for a day :(


A lot of these vieos are available on youtube if u need clearer instructions :) I'm merely trying out on my own and posting on this blog

Thursday 23 June 2011

Sample New nails

Sloppy flowers on toes :S


Milky Base, Curved red top, silver outline


Crystal Tree top-up

Monday 13 June 2011

How to: Diamond Dots

From this:


To This:


Step One: Dot polka dots with your white nail polish. The trick is it has to be big dots with adquate space in between.


Starting right from the centre, dot one in the middle, another two by the sides. Easy.


Continue to put two dots above the empty spaces of ur horizontal 1st 3 dots.


Repeat on top with another 3 dots. They can't be in a straight line with the previous row. Continue with the bottom, 2 dots and 3dots


And it should look like this:


Next i use the white nail dotter to make smaller and neater dots in between. Connect all the big dots diagonally using 2-3 small dots.


All the rows of 2 dots have to be connected to the row of 3 dots. The diamond shape will show very soon.


A toothpick might suffice for the small dots but it needs to be cleansed regularly to removce the lumps.


This is a good design as its not too flashy, yet at the same time, people WILL notice! *Shy smile*


I - have shaky hands, but if i can do it, so can u :)