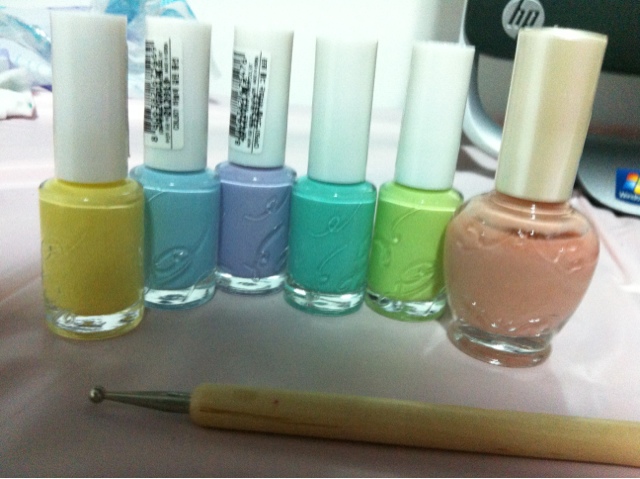
Choose your favorite colours!
I chose 5 candy colours n base was nudish
1) use a dotting tool and dot the end of the drip.
2) tap a trail of thinner line upwards to the tip of ur nails
3) repeat for about 3-4 times each nail
4) connect the tip of ur nails
5) touch up by placing big neat dots at the end of the drips
Not difficult to do with ur left hand either!
Saturday, 29 December 2012
Thursday, 13 December 2012
Rainbow peek
This particular nail art teaches that patience is virtue!
Starting from the bottom left picture, choose 4 to 5 awesome loud colours.
-I painted alternately vertical and horizontal stripes.
-pink, orange, yellow, blue n purple
-I used pastel pink n it kinda blend to natural colour, effect wasn't fantastic, try louder colour.
- wait patiently to dry
Bottom middle picture
-paste thin tapes diagonally across as many colours as u want
-I used 3 tapes per nail
-ensure the tail of the tape is sticking out so u can remove it easily
Bottom right photo
-paint black over everything
-I used Matt top coat at this point
-wait again
Finally, peel off all the tapes! :)
Starting from the bottom left picture, choose 4 to 5 awesome loud colours.
-I painted alternately vertical and horizontal stripes.
-pink, orange, yellow, blue n purple
-I used pastel pink n it kinda blend to natural colour, effect wasn't fantastic, try louder colour.
- wait patiently to dry
Bottom middle picture
-paste thin tapes diagonally across as many colours as u want
-I used 3 tapes per nail
-ensure the tail of the tape is sticking out so u can remove it easily
Bottom right photo
-paint black over everything
-I used Matt top coat at this point
-wait again
Finally, peel off all the tapes! :)
Monday, 3 December 2012
Christmas set
Christmas is coming!
1) Santa
- red base
- middle a stroke of beige for face
-outline curvy hat n beard
-fill in with white polish
- dot black eyes n red nose:)
2) snowFlake
-3 intersecting lines as shown
-2 inverted arrows on each branch
- careful not to let any branch be in contact with another, effect is not too good when they merge
3) snowman
-2 round shape, eyes and scarf
4) snowflake
-as above 2
5) snowing
-snowcap on tip
-snowfall dots
- twinkle
1) Santa
- red base
- middle a stroke of beige for face
-outline curvy hat n beard
-fill in with white polish
- dot black eyes n red nose:)
2) snowFlake
-3 intersecting lines as shown
-2 inverted arrows on each branch
- careful not to let any branch be in contact with another, effect is not too good when they merge
3) snowman
-2 round shape, eyes and scarf
4) snowflake
-as above 2
5) snowing
-snowcap on tip
-snowfall dots
- twinkle
Saturday, 1 December 2012
So long..
To continue on the gel polish..
It lasted for a good 68 days :) not because it was coming off, neither was it chipped, simply because it was too long n I badly wanted to try out the gradient set below!
So here are just some 'activities' I tried over it while it lasted. The more successful ones: Butterflies, flowers, siliver lining
It lasted for a good 68 days :) not because it was coming off, neither was it chipped, simply because it was too long n I badly wanted to try out the gradient set below!
So here are just some 'activities' I tried over it while it lasted. The more successful ones: Butterflies, flowers, siliver lining
Friday, 30 November 2012
Juicy Cocktail gradation set
Just bought 2 of these online because they look sooo awesome! and when i received it, i was sooo happy because the packaging is as the picture, pretty! And the mini size made it so cute as well.
So i tried it immediately, results -wise? Hmm not so impressive. I tried the turquoise on my fingers and heres wat i thought:
1) The base is more of 'whitish' rather than mint-ish
2) The 2nd layer perfect, love the mint effect, however it was too mild i felt its more suited for the base instead!
3) The Glitter. Ok i just dont work well with glitter. Especially these kind with 'bigger' pieces. I wish i could though.. how do i get rid of the empty spaces for intances? Multiple layers doesnt help..
Overall.. its good from afar :) I tried the orange one on my toes and because the glitter are smaller in size, it looks pretty good!
A nice colleague is going to Korea soon to help me get more from étude:) yay! Heard from another who just came back that these polishes are cheaper there but honestly, the online price is very competitive! just that there're shipping charges and reasonable 'mark-up' price.
Ps: will try dabbing method instead of just brushing soon. Hopefully the result will be better!
So i tried it immediately, results -wise? Hmm not so impressive. I tried the turquoise on my fingers and heres wat i thought:
1) The base is more of 'whitish' rather than mint-ish
2) The 2nd layer perfect, love the mint effect, however it was too mild i felt its more suited for the base instead!
3) The Glitter. Ok i just dont work well with glitter. Especially these kind with 'bigger' pieces. I wish i could though.. how do i get rid of the empty spaces for intances? Multiple layers doesnt help..
Overall.. its good from afar :) I tried the orange one on my toes and because the glitter are smaller in size, it looks pretty good!
A nice colleague is going to Korea soon to help me get more from étude:) yay! Heard from another who just came back that these polishes are cheaper there but honestly, the online price is very competitive! just that there're shipping charges and reasonable 'mark-up' price.
Ps: will try dabbing method instead of just brushing soon. Hopefully the result will be better!
Thursday, 18 October 2012
Gel blue shimmers
I have had these babies on for.. Lemme count..26 days!! Can u believe it?? Awesome and best gel I did. Somewhere in tanjong pagar.
So the trick to long lasting coat needs some 心机(scheming plans).
1) I was gg to attend 4 weddings in a mth so gel was the best option.
2) I chose blue turquoise to match one of my fren's wedding
3) note how the base is just glossed. So that when it grows out, u can barely see it! The main problem with gel is prob the outgrowth that's spoils the manicure right?
4) I topped with my coat of shimmers to let them blend more smoothly.
5) effort needed! Removed those normal polish shimmers when they start to come off n reapply. Looks like new again :)
6) can't really take too long nails, but I can buff off the top dark blue portion n it'll look like another design :) this time with more proportions on turquoise
7) gel makes your nails stronger, doesn't chip off easily. But if u repeated does it.. It's another story
8) I'm thinking I can keep cutting it as it grows, so I won't need to go back for removal:p
If u can tell the difference, of my initially done nails(1st picture) at the manicure- shorter n without own shimmers. That's cause for every colour u wanna add its about $15?? Not very cost friendly. But the gal was good! She used her fingers to Dab and even out, causing this effect:)
Whoo Hoo! I can stil stare at them for minutes everyday, wondering why they look as good as new:)
So the trick to long lasting coat needs some 心机(scheming plans).
1) I was gg to attend 4 weddings in a mth so gel was the best option.
2) I chose blue turquoise to match one of my fren's wedding
3) note how the base is just glossed. So that when it grows out, u can barely see it! The main problem with gel is prob the outgrowth that's spoils the manicure right?
4) I topped with my coat of shimmers to let them blend more smoothly.
5) effort needed! Removed those normal polish shimmers when they start to come off n reapply. Looks like new again :)
6) can't really take too long nails, but I can buff off the top dark blue portion n it'll look like another design :) this time with more proportions on turquoise
7) gel makes your nails stronger, doesn't chip off easily. But if u repeated does it.. It's another story
8) I'm thinking I can keep cutting it as it grows, so I won't need to go back for removal:p
If u can tell the difference, of my initially done nails(1st picture) at the manicure- shorter n without own shimmers. That's cause for every colour u wanna add its about $15?? Not very cost friendly. But the gal was good! She used her fingers to Dab and even out, causing this effect:)
Whoo Hoo! I can stil stare at them for minutes everyday, wondering why they look as good as new:)
Monday, 27 August 2012
Over-flow
1) Pink base
2) diagonal red across
3) dot 3 red dots on the pink base on the separation line
4) perform reverse alternate. Dot pink dots on red base n not in line with red dots( see pict)
5) dot smaller dots of alternate colour at each side.
NB: make sure polish is dry before every step!!
2) diagonal red across
3) dot 3 red dots on the pink base on the separation line
4) perform reverse alternate. Dot pink dots on red base n not in line with red dots( see pict)
5) dot smaller dots of alternate colour at each side.
NB: make sure polish is dry before every step!!
Subscribe to:
Posts (Atom)


