Saturday 29 December 2012

Melting candy

Choose your favorite colours!

I chose 5 candy colours n base was nudish

1) use a dotting tool and dot the end of the drip.
2) tap a trail of thinner line upwards to the tip of ur nails
3) repeat for about 3-4 times each nail
4) connect the tip of ur nails
5) touch up by placing big neat dots at the end of the drips

Not difficult to do with ur left hand either!


Thursday 13 December 2012

Rainbow peek

This particular nail art teaches that patience is virtue!

Starting from the bottom left picture, choose 4 to 5 awesome loud colours.
-I painted alternately vertical and horizontal stripes.
-pink, orange, yellow, blue n purple
-I used pastel pink n it kinda blend to natural colour, effect wasn't fantastic, try louder colour.
- wait patiently to dry

Bottom middle picture
-paste thin tapes diagonally across as many colours as u want
-I used 3 tapes per nail
-ensure the tail of the tape is sticking out so u can remove it easily

Bottom right photo
-paint black over everything
-I used Matt top coat at this point
-wait again

Finally, peel off all the tapes! :)


Monday 3 December 2012

Christmas set

Christmas is coming!

1) Santa
- red base
- middle a stroke of beige for face
-outline curvy hat n beard
-fill in with white polish
- dot black eyes n red nose:)

2) snowFlake
-3 intersecting lines as shown
-2 inverted arrows on each branch
- careful not to let any branch be in contact with another, effect is not too good when they merge

3) snowman
-2 round shape, eyes and scarf

4) snowflake
-as above 2

5) snowing
-snowcap on tip
-snowfall dots
- twinkle


Saturday 1 December 2012

So long..

To continue on the gel polish..

It lasted for a good 68 days :) not because it was coming off, neither was it chipped, simply because it was too long n I badly wanted to try out the gradient set below!

So here are just some 'activities' I tried over it while it lasted. The more successful ones: Butterflies, flowers, siliver lining


Friday 30 November 2012

Juicy Cocktail gradation set

Just bought 2 of these online because they look sooo awesome! and when i received it, i was sooo happy because the packaging is as the picture, pretty! And the mini size made it so cute as well.

So i tried it immediately, results -wise? Hmm not so impressive. I tried the turquoise on my fingers and heres wat i thought:

1) The base is more of 'whitish' rather than mint-ish

2) The 2nd layer perfect, love the mint effect, however it was too mild i felt its more suited for the base instead!

3) The Glitter. Ok i just dont work well with glitter. Especially these kind with 'bigger' pieces. I wish i could though.. how do i get rid of the empty spaces for intances? Multiple layers doesnt help..

Overall.. its good from afar :) I tried the orange one on my toes and because the glitter are smaller in size, it looks pretty good!

A nice colleague is going to Korea soon to help me get more from étude:) yay! Heard from another who just came back that these polishes are cheaper there but honestly, the online price is very competitive! just that there're shipping charges and reasonable 'mark-up' price.


Ps: will try dabbing method instead of just brushing soon. Hopefully the result will be better!

Thursday 18 October 2012

Gel blue shimmers

I have had these babies on for.. Lemme count..26 days!! Can u believe it?? Awesome and best gel I did. Somewhere in tanjong pagar.

So the trick to long lasting coat needs some 心机(scheming plans).
1) I was gg to attend 4 weddings in a mth so gel was the best option.
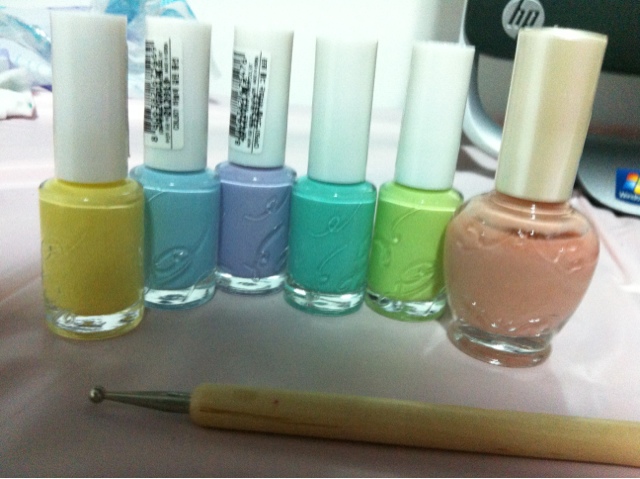
2) I chose blue turquoise to match one of my fren's wedding
3) note how the base is just glossed. So that when it grows out, u can barely see it! The main problem with gel is prob the outgrowth that's spoils the manicure right?
4) I topped with my coat of shimmers to let them blend more smoothly.
5) effort needed! Removed those normal polish shimmers when they start to come off n reapply. Looks like new again :)
6) can't really take too long nails, but I can buff off the top dark blue portion n it'll look like another design :) this time with more proportions on turquoise
7) gel makes your nails stronger, doesn't chip off easily. But if u repeated does it.. It's another story
8) I'm thinking I can keep cutting it as it grows, so I won't need to go back for removal:p

If u can tell the difference, of my initially done nails(1st picture) at the manicure- shorter n without own shimmers. That's cause for every colour u wanna add its about $15?? Not very cost friendly. But the gal was good! She used her fingers to Dab and even out, causing this effect:)

Whoo Hoo! I can stil stare at them for minutes everyday, wondering why they look as good as new:)

Monday 27 August 2012

Over-flow

1) Pink base
2) diagonal red across
3) dot 3 red dots on the pink base on the separation line
4) perform reverse alternate. Dot pink dots on red base n not in line with red dots( see pict)
5) dot smaller dots of alternate colour at each side.

NB: make sure polish is dry before every step!!

Friday 17 August 2012

Hologram

My new pet peeve! OPI Nothern Light silver. It creates this awesomely galatical universal feel! Probably due to one of the finest powdery glitter effect. Just need to shake it up to use it. The bottle alone was enough to entice me. Simply Magical!

Thursday 28 June 2012

Of butterflies n of flowers

Tried to make some butterflies n flowers but too tedious! Found stickers that a fren gave so here. Easy peasy!
Peel the stickers w a tweezer n Press down all sides after base coat is slightly dry. N walla

Twitter my nails

 Saw the twitter Icon on my phone and tried drawing it in pencil.
1) Twitter Bird
2) T symbol
3) Write new
4) Another bird
5) Reply to

Its easy with apencil but not with paint! luckily i have a black marker that claims its for nails. But no white ones though.. Would be good with the darker blue shade. Well, its just for fun below.


Wednesday 20 June 2012

Blossom

Let the Picts talk.

Base-dab light pink with sponge-3 black stripe branch- yellow flower dots

And nails protector! While waiting for it to dry

Friday 15 June 2012

A hobby

Today I passed by a shop and bought a nail related item. It happens most of the time I enter these shops. But I like to compare myself with people who has interest in:
Guitar, chasing band, watches, stuff toy, DVDs, iconic figurines, camera, IT gadgets etc

I don't really spend a lot :) might not even match up to just ONE of their collection. Just a happy thought! And in future i'll encourage my kids to collect bus tickets, post cards, tissue packet

Saturday 5 May 2012

Candelicious baby color dots

I was looking through the Nailsap for weeks n keep seeing how those people have so many yummy colours and I want too!! (baby, pastel shades)

And guess what, I found 2 in my drawer-_- bought a few months back and cause I bought quite a number, I haven had a chance to try them:s

Start with a base, My nails are now short so I put a generous coat of baby blue on! They are about half a nails length but it doesn't matter cause ppl can't get enough of these colours!! Haha and by ppl I mean me, and a few around me :s

Use a dotting tool to get the perfect circular dots. Which I don't have! I used to think toothpick or needles will do the trick but it's really different results. It's not flawless. I used a dotting pen, squeezed out a small ball of white before dapping on my nails.

Make sure ur base is dry else they'll merge. The position matters really. I've tried to embrace randomness before, dotting anwhere with space. But it turned out to be quite childish n messy. There must be a pattern, either straight or alternate. See my "diamond dots"

Oh yes, I bought these lovely colours from faceshop, there should be more and I'm excited to try!

Interchange the colours on every nail. Here's the result :)

Nails Applications

There are some free application for nails lovers! Here's 3 I think is pretty good :)

1) nailartdesign
It has a wide selection of designs but limited. I can finish them in one browsing session and then u have to wait for the update-_- but on a positive note, the photos are good quality so u can follow against:)

2) Nail art technique
This basically contains videos of ppl teaching how to DIY manicure. Very limited selection as well :p


3) Nailsap
I like this! U can upload n share your own nails, and browse thru what others all over the world has to share :) of course the downside would be some bad photo images but the updates are non-stop! U will also see how some Japanese has unfathom-able awesome designs :)


3D manicure :)

I knew I wanted to do 3D flower acrylic nail art for my wedding. They always look Sooo gorgeous in the magazines or photos. But you don't really have much occasion to do this! Haha, unless maybe a special ceremony or photoshoot.. Haha, just my thoughts, cant do it without an 'occasion' backing:p

Anw, did my "research" for about 3 weeks. I enter many shops to check if they have 3D nail art. Went my regular which only has 2D, seen some design template that are not to my likings. So in summary, most of those shops in far east charge by per finger ranging from $9 to $20. And its just for classic base.

I settled for NailsTalk opp redhill station. They have a Bridal package I thought was pretty good! Mine was $148 for
-gel manicure
-3D nail art
-classic pedicure

I went there to see what they can offer and they let me choose from a Jap magazine! Do u know how awesome Japanese are in nail art??? I could select from more than 20 pages and I loved most of them! However... The first few I chose was all double flowers. Ie: draw one on top of the other. She discouraged me from choosing them which I later listened. Here's why:

1) takes too long to do
2) bulky on my nails
3) easier to 'chip' since there's additional edges to worry about.

Anw finally settle for one and was informed it'll take 3hrs and cost $18 to remove next time

Check out their web @ nailstalk.sg

They lasted more than 21 days n only a few crystals falling out. I just stick them back with my supply:)

Gel rocks! Only a pain to remove :p